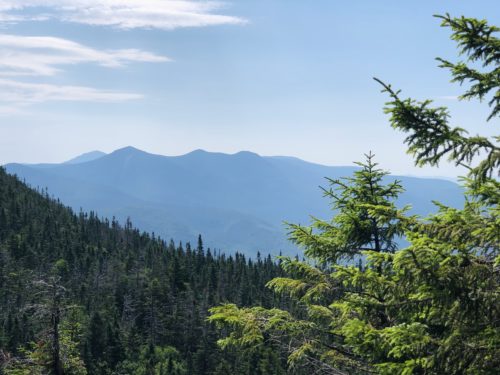
So, you’ve found yourself at the top of Mount Osceola. You’ve taken your summit selfie (The Starfish – nice choice), and now you’re eating a summit snack, while mosquitoes snack on you. You’ve reached a pivotal juncture – do you forge on, bag East Osceola and face that big, bad Chimney you’ve heard so much about? Or do you leave it for another day?
2019 me wasn’t ready for the Chimney – so I opted out and decided to save it for another day. A year ago, I finally faced the Chimney (and my fear of heights), and discovered that it wasn’t the mythological beast – or as Metallica calls it, The Call of Ktulu – created in my head.
So, if you suffer from a fear of heights – likely due to childhood trauma involving a Ferris wheel at some sketchy carnival – this how-to guide is for you. Here are my tips/tricks to make the Chimney your bitch:

First, let’s talk about the trail
The hike up to Osceola is lovely, with moderate grades and forgiving switchbacks (a rarity in the Whites), but things quickly take a turn once you hike on over to East Osceola. The trail is rough, rocky and steep. The good news is it’s only a mile over to East Osceola, and while this rough section of trail kinda sucks, it is a good preview of what hiking many of the 4000 footers will be like – as the rocks will only get bigger, and the trails will only get steeper.

Now, let’s talk about the bypass
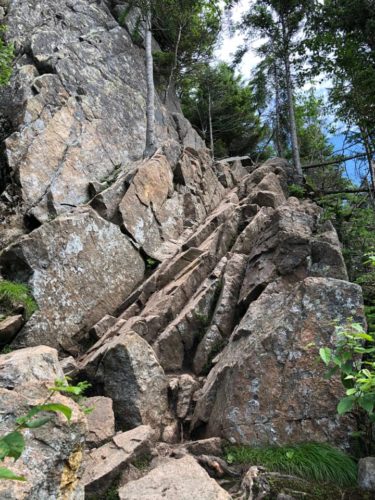
As you head over to East Osceola, the Chimney will be on your right and the bypass will be on your left. But if you’re like me, and your mind frequently wanders off into outer space – Ground Control to Major Tom – you will most likely find that you have somehow just wandered onto the bypass. You’ll know you’re there when your hike turns into a strange form of crab-walking onto a particularly steep and janky rock section. At this point, you may even find yourself thinking: “Oh shizzle! Am I on the Chimney!?” While I assure you, you most likely are not – the bypass isn’t exactly a walk in the park either.
Hot tip: if like me, you suffer from l’appel du vide and the gravitational pull to fall forward is strong – I recommend unbuckling your pack and (with dramatic flourish), throwing it down to the trail at the bottom of the bypass to regain your center of gravity. Or just hand it down to a friend, although that’s far less dramatic.
Phew! You made it down that damn bypass, now what?
As Bon Jovi says, “Woah, we’re halfway there!” and you’re now halfway to East. At this point, just more of the same rocky bullsh*t – which will eventually lead you to the viewless pile of rocks, otherwise known as East Osceola. Once there, feel free to grab another summit selfie – thumbs up works best or – if you’re feeling frisky – flipping the bird at that stupid pile of rocks.
Now, it’s time to turn around and as Missy Elliot says, “Flip it, and reverse it.”
Bypass or Chimney? The choice is yours.
And you’re back. The Chimney is now on your left, and the bypass is on your right. At this point it’s up to you, there is no wrong choice – and as always YOU DO YOU on the trails. You know you better than some weirdo internet stranger who has a fairly eclectic taste in music.
For this weirdo – and on that particular day in 2020 – I told my fears to take a hike and went for that Chimney. So here’s my advice to you, fellow weirdos with fear of heights – and hopefully better taste in music than me:
Step 1: Breathe
Breath is LIFE (literally), so first focus on calming your breathing as much as possible. As a yoga teacher, I know plenty of serenity now breathing techniques. So, take a deep breath, inhale through your nose, and open-mouth exhale. Repeat as necessary to find your inner namaste. ?
Step 2: Start climbing
Look up and figure out all the nooks and crannies you can use as handholds/footholds and get climbing. Once you’ve secured both hands and both feet on the Chimney, figure out your next move.
Important: keep both hands and both feet in place until you figure out your next step. Then as you climb up, move only one body part at a time, always keeping at least 3 points of contact as you ascend – go slow, be methodical – and for the love of God, don’t look down.
And another note: if you suffer from stumpy-leg syndrome like me (thanks Mom), there may be a point where your next move feels a bit far out of reach. But you got this, and it’s not nearly as dramatic as your mind thinks it is.
Step 3: Conquer the Chimney!
Congratulations, you conquered the Chimney! At this point you’re flying high on those endorphins, so like R. Kelly says, BELIEVE you can fly, BELIEVE you can touch the sky – on second thought, don’t be like R. Kelly. But do feel AMAZING, because YOU did it and you’re one step closer to completing the 48!
Hike on! And feel free to drop some mountain music suggestions below, because clearly I need to update my mountain-drive playlist! ?✌️?


May 24, 2022
I loved your post and it brought back a funny memory of when I hiked there in 2020 with my 53 lb. Huskey (Kodi) who was deathly afraid to go down and it took a while to do it with him. However, on the way back he absolutely refused to go up it. After a few minutes of trying to get him to go, I picked up my scared and squirming dog and carried him up. I was exhausted near the top and put him down ahead of me thinking he would just go that last little bit. Wrong!! He ran back down in a panick and I had to climb down, grab him, and carry him up again. I am 70, so believe me when I say it was no easy task! I have to say that despite that experience, he still loves me and we hike all the time.
August 7, 2022
I found your website when I was looking for information about the chimney. I’m afraid of heights and wanted to know if it was something I could or even should try. Thank you for the detailed write-up! I ended up using the chimney on both the up and the down, and your post helped me both build up some confidence and give me some useful info.
(I managed to sprain my ankle a little past on the chimney on my way to the East Peak, but hey, I can hardly blame a fear of heights for that!)